This QuickStart Guide will get you up and running with the Papilio DUO software and focuses on using the FPGA side of the Papilio DUO.
This Guide will cover:
- Determining which serial port your Papilio DUO is connected to. (FPGA Side)
- Viewing and Loading a circuit to the Papilio DUO. (FPGA Side)
- Loading a sketch to the ZPUino Soft Processor. (FPGA Side)
Please take a look at these additional guides (coming soon):
- Loading a sketch to the Papilio DUO – AVR Side
- Loading a circuit to the Papilio DUO FPGA side and a sketch to the AVR side
- DesignLab – Editing a Circuit
Connect FPGA USB Port
First of all you want to make sure you are plugging in the correct USB port in order to use the FPGA functionality which allows you to load custom circuits to the FPGA.
PWRSEL
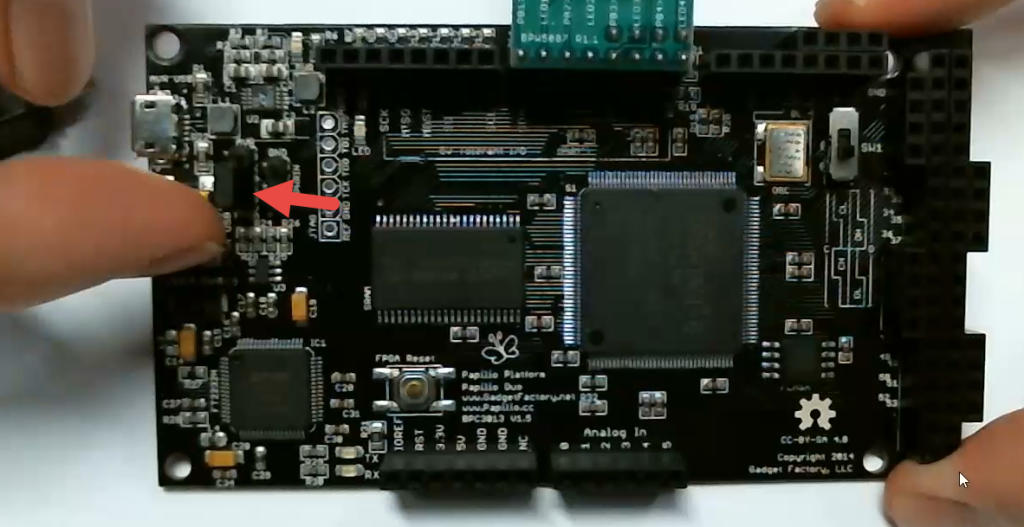
The Papilio DUO has two options for receiving power – from the FPGA USB port or the AVR USB port. If you will be plugging in the FPGA side and not the AVR side then you need to ensure that you have the PWRSEL jumper on the FPGA side. The FPGA power option is selected when you have the jumper connected to the bottom of the three pin header.
Connect FPGA MINI-USB Port
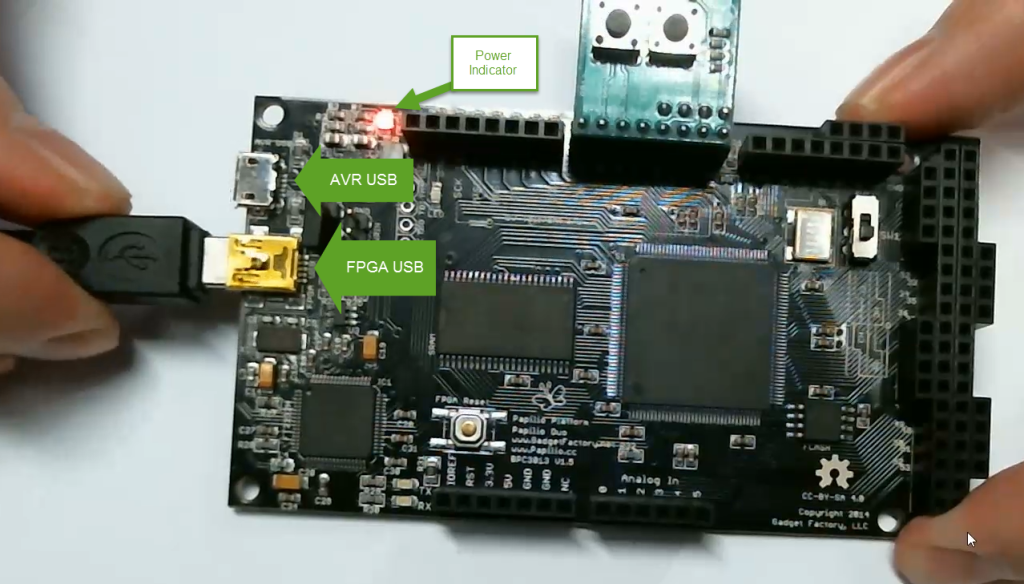
There are two USB ports on the Papilio DUO – one for the FPGA (Mini-USB) and one for the AVR (Micro-USB). Be sure you are plugging in the Mini-USB port that is labeled FPGA USB.
Be sure that the power indicator light comes on. If it does not then double check your PWRSEL jumper.
Determine Serial Port
The next step is to figure out which serial port the Papilio DUO is being assigned to. There are two ways to do this:
- The easiest is to plug in the Papilio DUO and look at the connected serial ports. Then disconnect the Papilio DUO and see which serial port has disappeared, this should be the Papilio DUO serial port. This is a very quick way to tell which serial port is being assigned.
- The more accurate way of determining your serial port is to look at the device manager. You can hit CTRL-X under Windows 8 to find the device manager.
Video Clip of disconnecting and reconnecting Papilio
(Press fullscreen button in Youtube video and select HD 720p for best quality.)
Video Clip of using device manager
(Press fullscreen button in Youtube video and select HD 720p for best quality.)
Select the Board
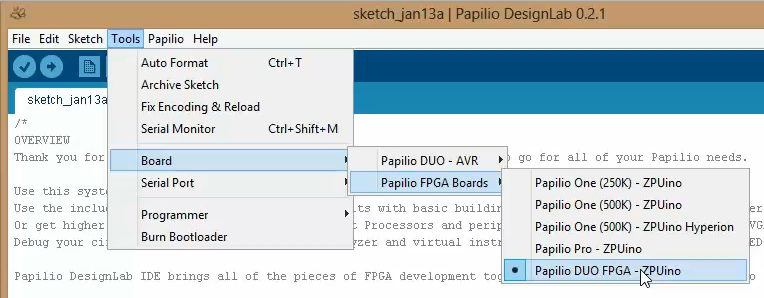
Next you need to make sure you are setting your board type for the Papilio DUO FPGA.
Select Tools/Board/Papilio FPGA Boards/Papilio DUO FPGA – ZPUino
Open the DUO Quickstart Project
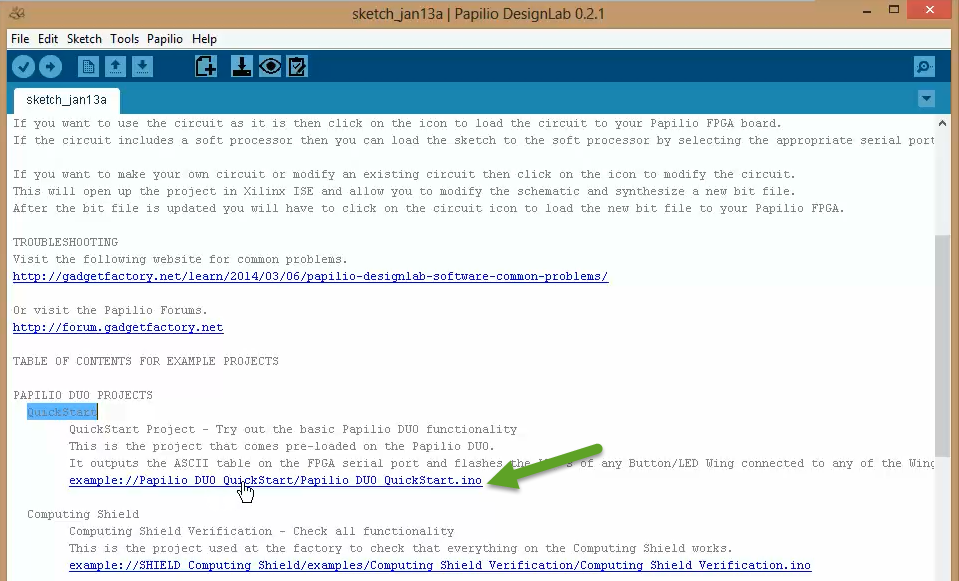
To open the Papilio DUO Quickstart project scroll down on the initial table of contents page until you find the “Papilio DUO Projects” section. Click on the QuickStart project to open it up in a new window.
Video clip of opening DUO Quickstart Project
(Press fullscreen button in Youtube video and select HD 720p for best quality.)
View and Load the Circuit
All sketches in DesignLab now have a FPGA circuit associated with them. So to use a sketch you will first need to load the associated circuit to the FPGA. Before you load the circuit though, you might want to take a quick peek and see what is in the circuit.
View the circuit
DesignLab has some new icons that you can use to view, load, and edit circuits. In order to view the circuit find the “View Circuit” icon and press it:
Once you press this button the circuit will be loaded up using the Adobe PDF viewer. Be sure you have Adobe PDF installed on your system. For Linux you may need to set the path of the PDF viewer in the DesignLab settings.
Video clip of viewing the circuit
(Press fullscreen button in Youtube video and select HD 720p for best quality.)
Load the circuit
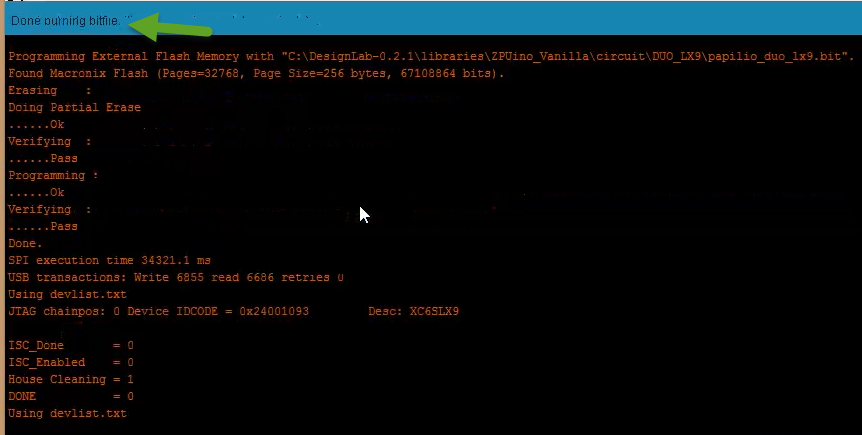
Press the “Load Circuit” icon to load the circuit to your Papilio DUO FPGA.
Ensure that DesignLab says, “Done Burning Bit File”
Video clip of loading the circuit
(Press fullscreen button in Youtube video and select HD 720p for best quality.)
Load Sketch to ZPUino
When we viewed the circuit earlier we saw that it contained a ZPUino Soft Processor. When our circuit contains a Soft Processor we can load a sketch to that Soft Processor after we have loaded it to the FPGA.
Double check and make sure you are connected to the correct serial port. It should be the Papilio DUO FPGA serial port.
Press the “Upload” icon.
Confirm DesignLab says, “Done Uploading”
Once the Quickstart sketch is loaded you should see the LED’s of any Button/LED Wing connected to the Papilio DUO start to blink. If you hold down any of the buttons the corresponding LED should stay solid.
The Quickstart sketch also outputs an ASCII table to the serial port at 9600 bps.
Video clip of loading the sketch to the ZPUino soft processor in the circuit
(Press fullscreen button in Youtube video and select HD 720p for best quality.)
Full Walkthrough Video
(Press fullscreen button in Youtube video and select HD 720p for best quality.)

