
Get up and running with the Papilio Loader GUI in Linux. Papilio Loader – not just for Windows anymore!
The latest version of the Papilio Loader supports installing and running the GUI under Linux. This guide shows you everything you need to start using the Papilio tools in Linux.
Watch the embedded video or continue reading for a summarized version of how to install the Papilio Loader GUI in Linux.
Install Papilio Loader
Download and extract the Papilio Loader Installer
Download the Linux tar file from Gadget Factory download section and extract to your directory of choice.
Install required libraries
Ensure that libftdi-dev and the Java SDK is installed.
In ubuntu do the following command:
$ sudo apt-get install libftdi-dev default-jdk
Run Installer
Navigate to the directory containing the downloaded install package and run the installer.
$ ./linux-installer.sh
No Root Required!
Add your user to the dialout group
$ sudo usermod -a -G dialout `whoami`
Change the group that the Papilio Programmer belongs to the dialout group
$ sudo chgrp dialout /usr/local/bin/papilio-prog
Lastly, you need to add a udev rules file for the Papilio. This rule instructs the udev system that the Papilio USB device should be owned by the dialout group when it is connected.
Create the following file:
$ vi /etc/udev/ruled.d/papilio.rules
Paste the following into the file:
SUBSYSTEMS=="usb", ATTRS{idVendor}=="0403", ATTRS{idProduct}=="6010", GROUP="dialout"
You will then need to disconnect and reconnect your Papilio board for the new rules to be applied.
You should now be able to run the Papilio programmer from your unprivileged user account:
$ papilio-prog -c

Using built-in device list

JTAG chainpos: 0 Device IDCODE = 0x24001093 Desc: XC6SLX9

ISC_Done = 1
SC_Enabled = 0
House Cleaning = 1
DONE = 1
Usage
Two new executables will now be available on the path.
To use the GUI:
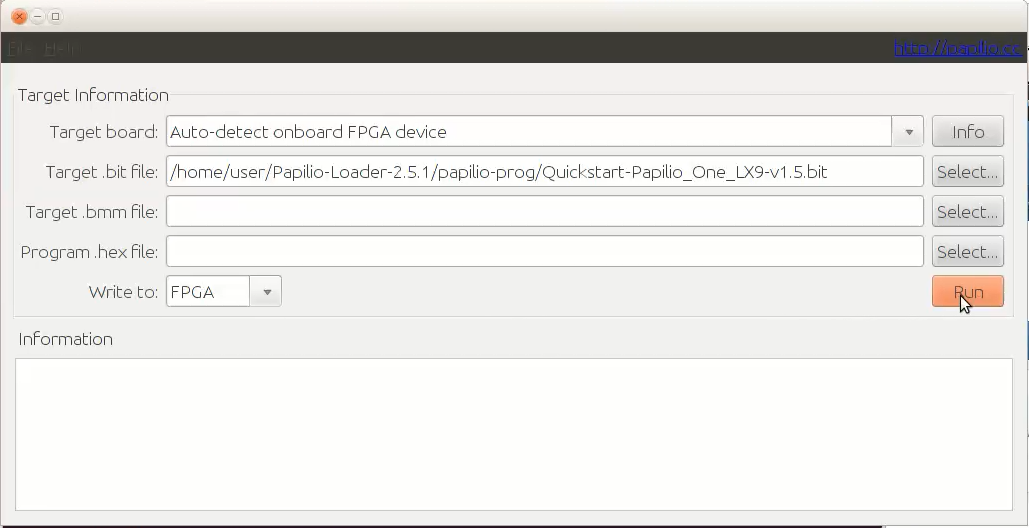
papilio-loader-gui
To use the command line tool
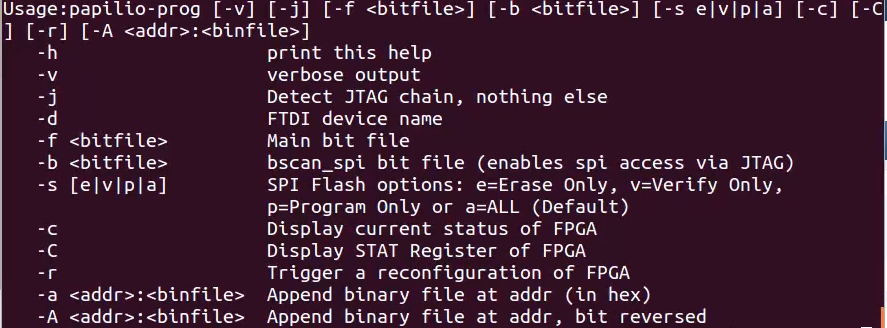
papilio-prog