
We live in exciting times where we can create masterpieces with the Arduino and marvels with the Raspberry Pi. Where we can use technology as a canvas to create things that amaze and amuse our friends and family. Wouldn’t it be great if we could take the same technology that has been the staple of rocket scientists and put it in our creative arsenal? Without the need tobecome a rocket scientist or the headache of learning a new programming language like VHDL/Verilog.
Why can’t we just draw up the circuits that we want to use? With the right software and circuit libraries we can! Let’s put a full circuit lab on a chip, pair it with an easy to use Arduino-Compatible chip, and sprinkle in a generous helping of debugging tools.
Our dream is to take the hardcore out of FPGA (Field Programmable Gate Array) and make it an amazing tool that anyone can use for creative technology projects.
Just like the Arduino team simplified C++ programming, we simplify FPGA design by providing easy to use drag and drop circuit libraries. We believe that drawing circuits will result in an amazing outpouring of creative FPGA projects!
We start with the Arduino IDE (Integrated Development Environment) and supercharge it by adding circuits into the mix. We bring all of the pieces needed to draw and debug your very own circuits in one place. It’s an easy and seamless user experience that we call Papilio DesignLab for use with both Windows and Linux.
Want to get into more complex circuits? DesignLab includes the ZPUino Soft Processor with a Wishbone bus, providing greater speed and flexibility than the Arduino-Compatible chip. A Soft Processor runs inside the FPGA and uses the Wishbone bus to make it easy to connect peripheral circuits, such as UARTs, PWMs or SPI masters. Making your own Soft Processor with just the right mix of peripheral circuits is known as a SOC (System On Chip) design. With DesignLab you can draw your SOC designs in minutes!
Create SOCs with ten serial ports, or a PWM on every pin, or something exotic like classic Atari and Commodore audio chips connected at the same time. The sky is the limit, you can create things that don’t exist anywhere else!
DesignLab Circuit Library
Drawing circuits can only accomplish so much without a library of circuits (known as cores) to do the heavy lifting. Our goal is to provide the framework for anyone to write a core that can be wired into a circuit.
We want to seek out the best open source circuits on the interwebs and convert them to a dead simple schematic library. The internet is absolutely full of open source circuits; just take a look at sites like OpenCores.com. You will find everything from classic audio chips to stepper motor controllers. All of these amazing circuits are within our reach when converted to schematic form and included with DesignLab IDE!
Prerequisites
If you wish to edit circuits in DesignLab you will also need to install the free Xilinx ISE Webpack software.
Full Video Walkthrough
Download
Go to the Gadget Factory download page and download the latest version of DesignLab IDE.
Be sure to get the linux32 or linux64 version depending on your operating system.
Extract the tar file to a location of your choice.

Click image to watch video.
Run Install Script
The install script will download necessary packages such as libftdi-dev, libusb-dev, and such. It will also set up permissions so DesignLab can access the Papilio hardware as a user without elevated root permissions.
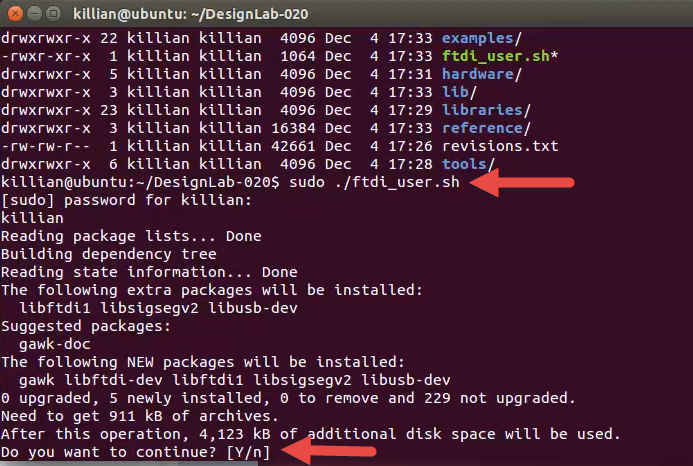
Open a shell and navigate to the directory you unzipped DesignLab to.
Execute the following command:
sudo ./ftdi_user.sh
Give permission to install packages.
If you want the the user space permissions to take affect then you will need to log out and back in or reboot.
Install Java Runtime Environment – JRE (Optional)
DesignLab requires Java to run, if you already have a JRE or JDK installed then you can skip this step. If not then please install with the following command in Ubuntu:
sudo apt-get install default-jre

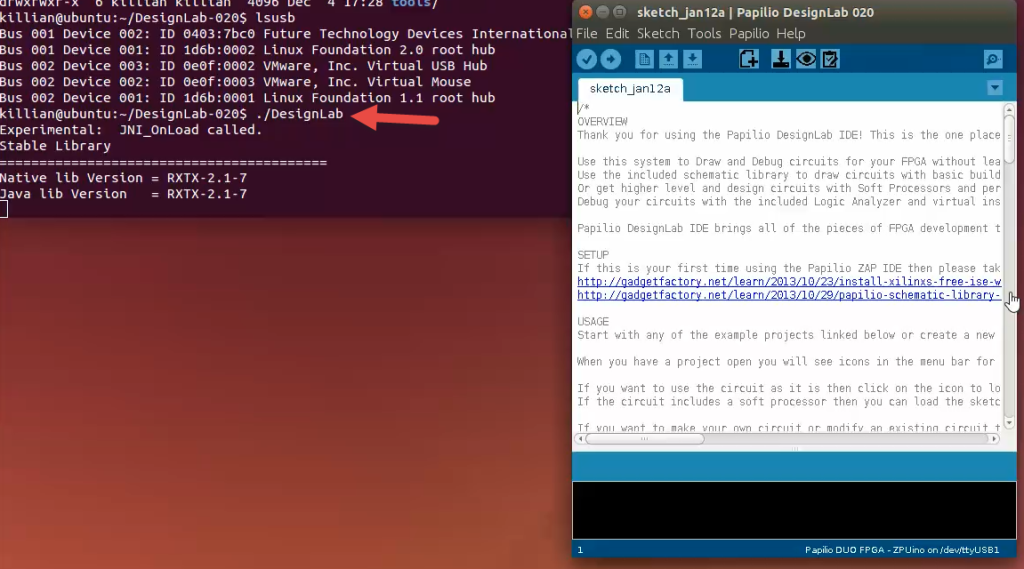
Run the DesignLab Application
Navigate into the DesignLab directory.
Execute the DesignLab application as a user – no sudo or root required:
./DesignLab
Verify it works!
To verify that everything works we can load the Papilio DUO Quickstart project to our Papilio DUO board.
Connect your Papilio DUO FPGA USB port and verify it shows up. A lsusb command should show a “Future Technology Devices International, Ltd” with ID of 0403:7bc0
lsusb
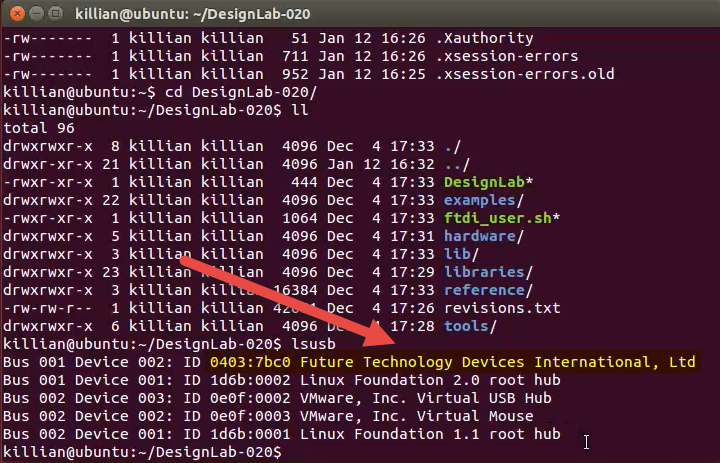
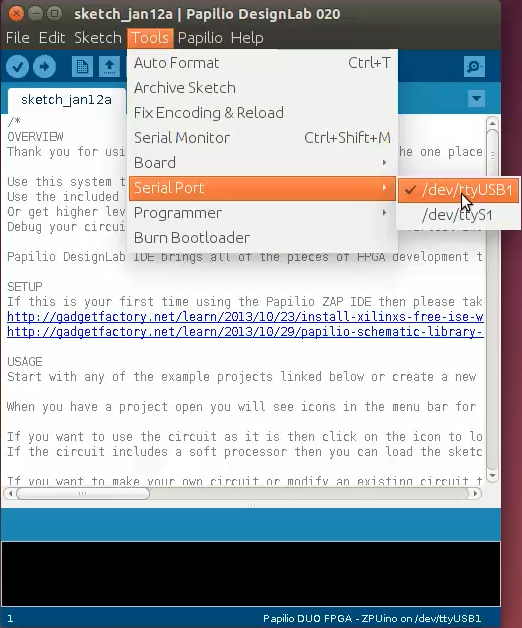
You will also see the /dev/ttyUSB1 device (it might differ on your machine) show up under Tools/Serial Port. Unplug your Papilio DUO and verify it goes away and then comes back when you plug it in again.
Next Steps
Be sure that you have installed the Xilinx ISE Webpack software along with DesignLab so you can use DesignLab to its fullest and edit circuits.