
Load the Arduino bootloader to the Papilio DUO without an external programmer. The Papilio DUO is amazingly flexible due to the ability to load any circuit to the FPGA fabric. This project shows how to load a circuit that connects the FT2232H SPI/MPSSE pins to the JTAG debugging port of the ATmega32U4 chip. This allows us to use a special piece of software called HappyJTAG2 to emulate a JTAGICE MKII debugger, effectively letting us set fuses, load hex files, and even debug the ATmega32u4 chip. This tutorial shows how to set everything up and program a hex file, in this case the Arduino bootloader. Look for future tutorials on how to debug the ATmega32u4. (This is for Windows users only.)
Video Walkthrough
Setup
Open up DesignLab and find the Papilio_DUO_happyjtag2 project.
Generate Bit File
Open the sketch directory and open the PSL_Papilio_DUO_LX9.xise file.
In Xilinx ISE double click on the Papilio_DUO_LX9.sch file to look at the schematic.
Click on the Design tab.
Select the top level module and double click on “Generate Programming File”
Load Bit File
Plug in the FPGA USB port (the mini-USB) of the Papilio DUO to your computer.
Go back to the project folder and enter the DUO_LX9 folder.
Double click on the papilio_duo_LX9.bit file and make sure Papilio Loader pops up and loads the bit file to SPI Flash of the Papilio DUO.
Open HappyJTAG2
Go to the happyjtag2 folder in the project folder and run HappyJTAG2.exe as administrator
Say “No” to any warning messages.
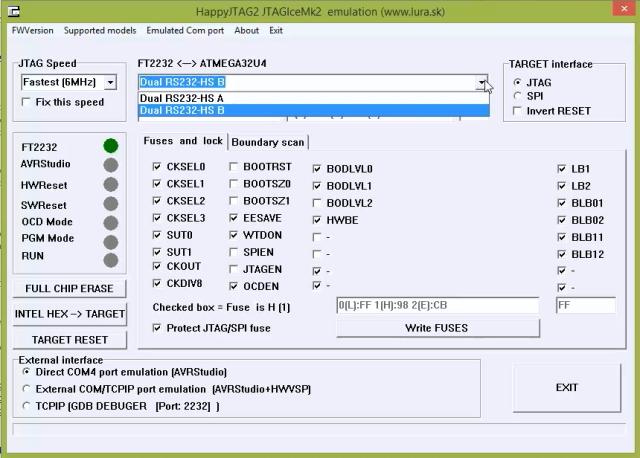
Make sure that “Dual RS232-HS B is selected”
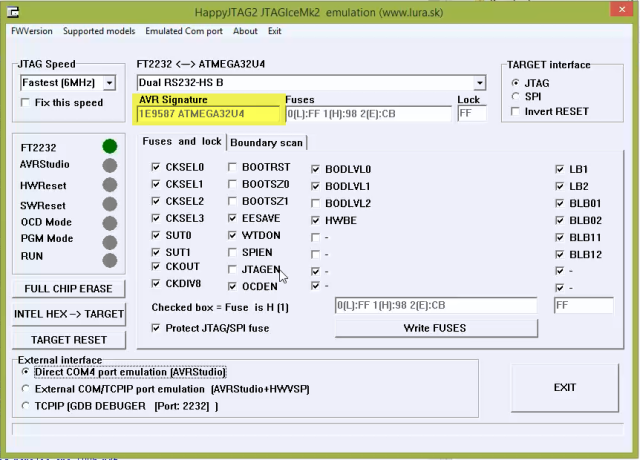
Make sure it detects the AVR Signature
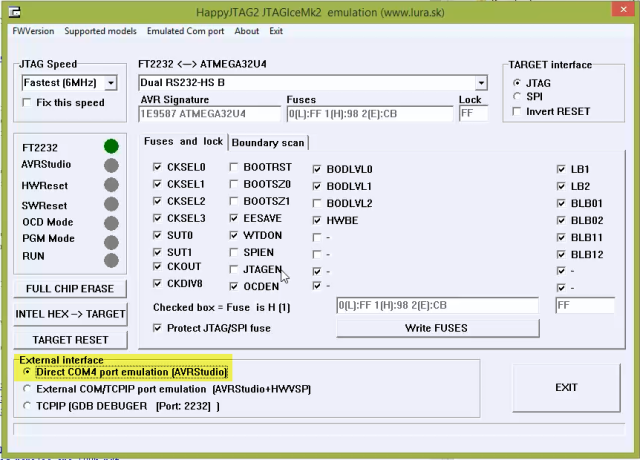
Make sure “Direct COM4 port emulation (AVRStudio)” is selected
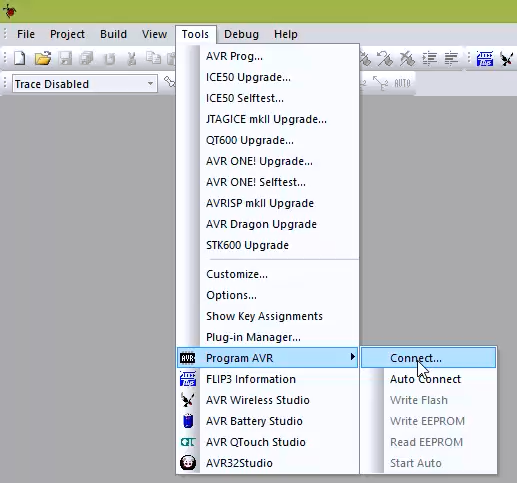
Connect to HappyJTAG2 with AVR Studio
Open the AVR programmer by going to tools/Program AVR/Connect
Make sure JTAGICE mkII and COM4 are selected, press connect.
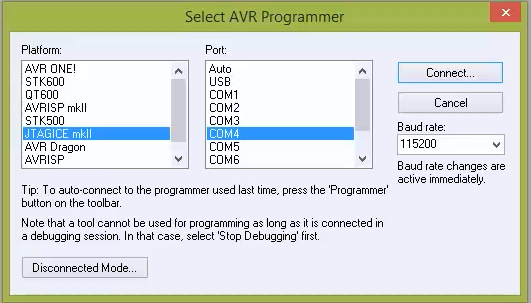
Do not upgrade the firmware if it asks!!!!
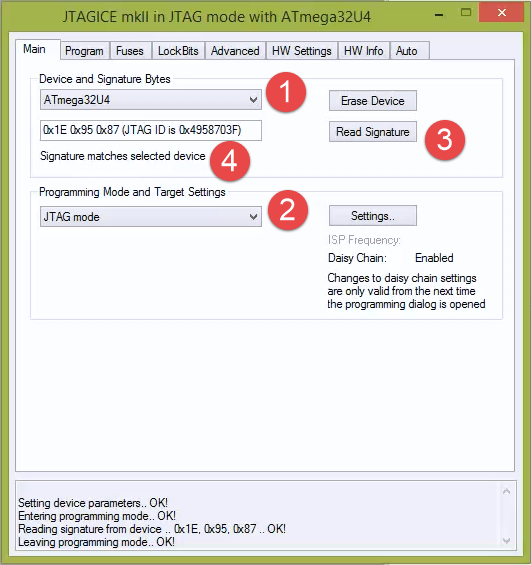
Read the Signature
- Make sure ATmega32U4 is selected
- Make sure JTAG mode is selected
- Click Read Signature
- Verify the correct signature shows up!
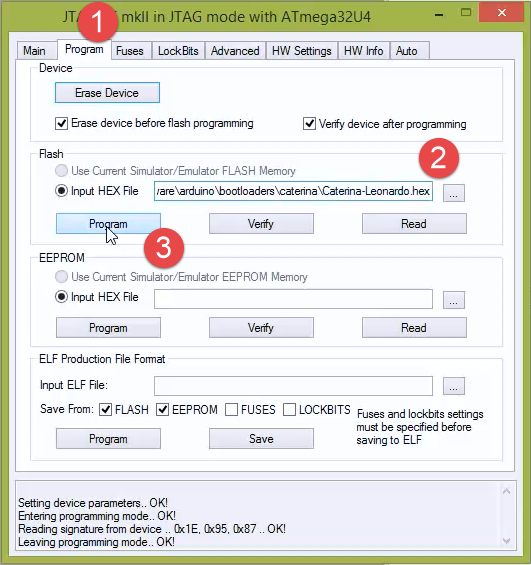
Load Arduino Bootloader
- Click on Program
- Load the Arduino Leonardo bootloader from any Arduino or DesignLab project directory by going to hardware\arduino\bootloader\caterina\Caterina-Leonardo.hex
- Click Program
Verify it works!
Plug in the ATmega32U4 USB port which is the Micro USB connector.
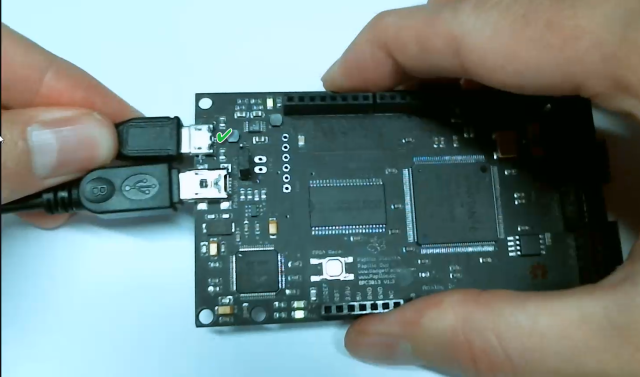
Open Windows Device Manager and verify that the Arduino Leonardo shows up under Com Ports
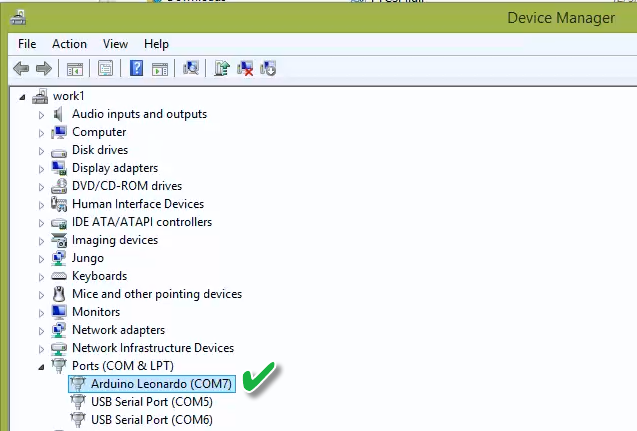
Celebrate with a beer! The Arduino Leonardo bootloader is now on the Papilio DUO without using any external hardware!